

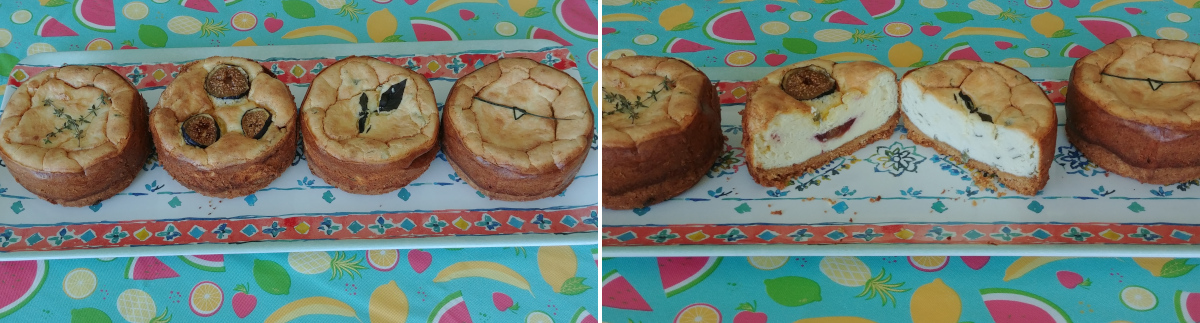
Goat Cheese Mini Cheesecakes explore cheesecake’s savory side. Select a creamy but not runny goat cheese for this recipe for the best results. We used three different herbs, fresh thyme leaves, snipped chives and different varieties of basil leaves sliced into thin ribbons, along with thinly sliced fresh mission figs to accent our Goat Cheese Mini Cheesecakes in this recipe. Feel free to use a selection of herbs or seasonal fruit of your choice when making Goat Cheese Mini Cheesecakes at your house.
There are “must-do” parts in this recipe: 1) use four 4” springform pans, preferably with a non-stick coating, 2) use an electric hand mixer and 3) after baking, leave the cheesecake in the oven with the door propped open and the heat turned off for 1 hour to rest.
While many recipes call for using a bain marie or water bath when baking cheesecake, it can be cumbersome. For most home bakers, it is difficult to execute properly and if you get a leak between the springform pan and the bain marie, you have a soggy disaster on your hands. While the water bath method is supposed to result in less cracking of the top crust, that has not been our experience. That said, some light cracking in the cheesecake’s top crust adds character and the small crevices serve as wonderful reservoirs for a sauce topping.
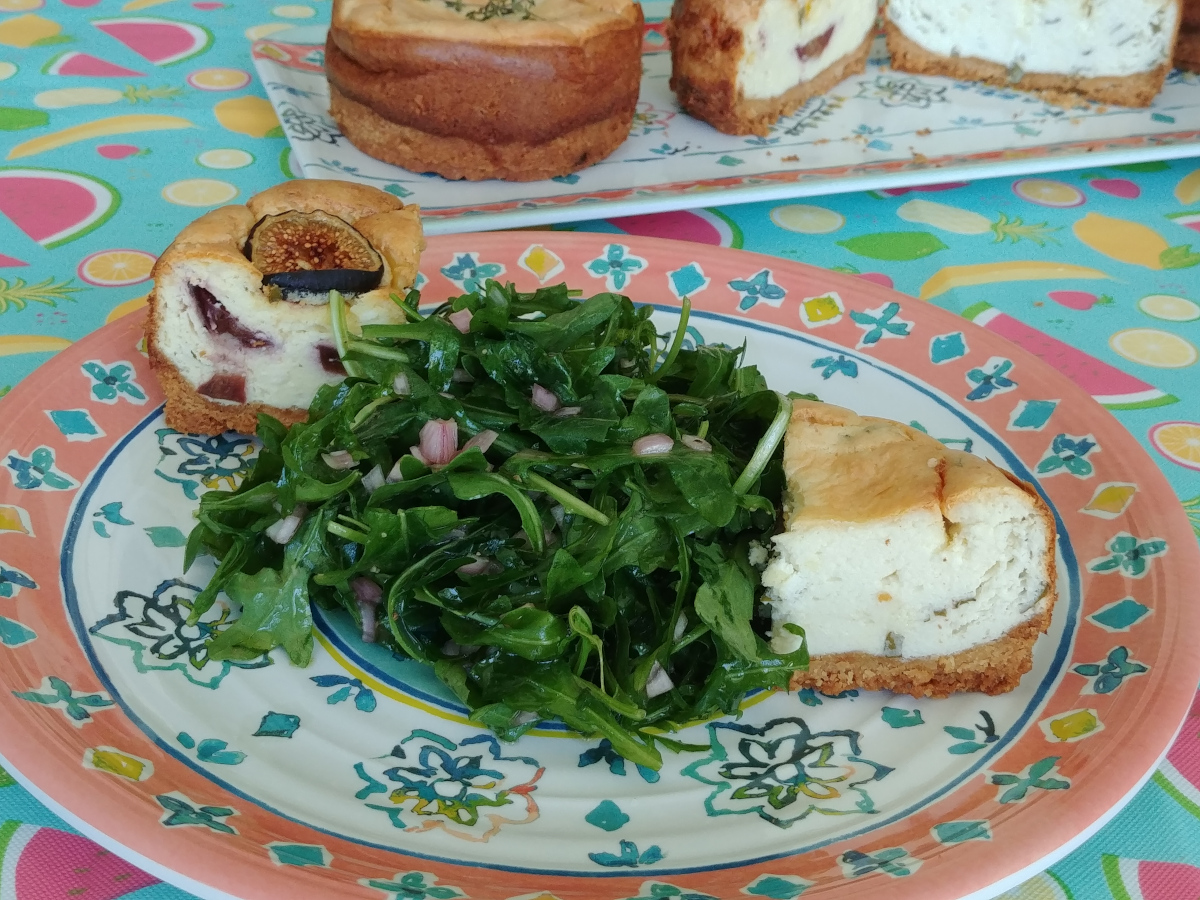
We enjoy serving quarters of two different Goat Cheese Mini Cheesecakes with a lightly dressed simple green salad or sliced heirloom tomatoes, either for lunch or as an appetizer, using just one cheesecake quarter per plate, at dinner. Get creative and enjoy!
For the crust: Prep Time: 15 minutes Total Time: 35 to 45 minutes.
For the cheesecake: Prep Time: 1-hour, Total Time: 3 hours.
Yields Four 4-inch mini cheesecakes, each of 4 servings.
Support Cook and Eat at Home. Purchase a PDF of the Goat Cheese Mini Cheesecakes recipe for $1.00
Ingredients:
For the crust:
- 1 ¾ cup Almond Flour
- ½ tsp. Corn Starch
- ½ tsp. Baking Powder
- ¼ tsp. fine Sea Salt
- 4 tbs. melted Unsalted Butter
- 1 large Egg, beaten
For the cheesecake:
- 14 ounces Goat Cheese
- 12 ounces Cream Cheese, do not use low or no fat cream cheese
- 4 Eggs
- 2 Tbs Corn Starch
- 1 Tb each Selection of Fresh Herbs and/or Fruit
Preparation:
Making the crust (recommend doing this a day ahead of making the cheesecake):
- Preheat oven to 350° F. In a large bowl, mix together the almond flour, corn starch, baking powder, and sea salt.
- Add melted butter, mix with the dry ingredients lightly, then add the beaten egg and mix together to form the crust dough.
- Using your hands, press the dough evenly into the bottom of a four 4-inch springform pans, taking care to avoid thicker crust at the bend of the pan from the bottom to the sides; prick the dough with a fork to make holes into the crust.
- Bake the crust to a light golden-brown, approximately 20 to 30 minutes depending upon the calibration of your oven; remove the crust from the oven place on a rack and allow to cool completely. Do not remove the crust from the springform pan.
Making the cheesecake:
- Let goat and cream cheeses soften in their packaging at room temperature for an hour before using.
- Remove the softened goat and cream cheeses from their packaging and place in a large mixing bowl.
- Separate the egg yolks from the whites. Reserve the egg whites separately.
- Add the egg yolks to the softened cheeses along with the corn starch. Using an electric hand-mixer, mix until well-blended; the batter will not be entirely smooth.
- Preheat the oven to 325 degrees F.
- Add the egg whites to a separate bowl, preferably a copper one-ring bowl designed for beating egg whites. Using an electric hand-mixer with the whisk attachment, whisk the egg white until stiff peaks form.
- Using a rubber spatula, gently fold half of the whisked egg whites into the batter until lightly combined, then fold the remaining whisked egg whites into the batter taking care not to overly mix the batter.
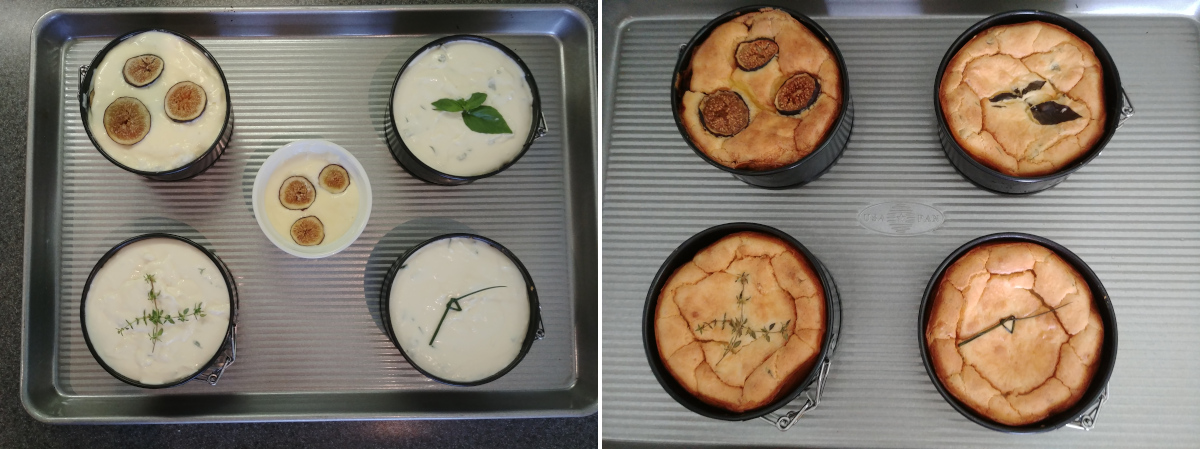
- Divide the batter into 4 bowls. Into each of the bowls of batter, add fresh herbs leaves, saving a bit to place on top of each mini cheesecake prior to baking to identify which herb or fruit was used. If using fruit, you can mix the chopped or sliced fruit into the batter or pour half the unseasoned batter into the springform pan, place a layer of the fruit, then top with the balance of the batter. We used snipped chives, thyme leaves, assorted basil leaves sliced into thin ribbons and sliced figs.
- Pour the batter into each springform pan slowly and give the pan a gentle shake to evenly settle batter in the pan. Place the springform pans on a baking sheet and bake at 325 degrees F on a centered rack in the oven for 1 hour at which time the mini cheesecakes’ centers will appear firm and the top a deep golden-brown color.
- This step is mission critical! Turn off the oven, pop the oven door open a few inches, most ovens have a catch in the door mechanism to permit this, and let the mini cheesecakes cool in-place for a minimum of 1 hour. Do not remove the mini cheesecakes from the oven. There will be some settling as the mini cheesecakes cools which is normal.
- Remove the mini cheesecakes in the springform pans and baking sheet from the oven and set the baking sheet aside. Place the springform pans on the counter and run a blunt-tipped knife around edge of the mini cheesecakes to release it from the pan and allow it to continue to cool for at least 30 minutes.
- Using the lever, release sides of the springform pan and use the blunt-tipped knife once again to release any spots of the mini cheesecakes’ sides which may still be stuck to the pan. Remove the springform pan sides and allow the mini cheesecakes to continue to cool completely.
- This recipe will yield 16 servings by cutting the Goat Cheese Mini Cheesecakes into four servings each. Enjoy!
*Notes:
- Preparing the crust can be done a day ahead of preparing the cheesecake batter and baking; we strongly recommend that you do so.
Leave a Reply